DNS & Reverse Proxy
Manage your domains and route traffic using different methods of DNS and Reverse Proxy.
- Cloudflare
- Setup your Domain with Cloudflare
- Create Domain Records to Point to your Home Server on Cloudflare Using Nginx Progy Manager
- Nginx Proxy Manager
Cloudflare
Cloudflare, Inc. is an American web-infrastructure and website-security company, providing content-delivery-network services, DDoS mitigation, Internet security, and distributed domain-name-server services.
Setup your Domain with Cloudflare

To use Cloudflare as your domain controller, you need to have a domain name already purchased. I use Porkbun because they have a very user friendly dashboard and each domain comes with free domain privacy or redaction.

Once you have your domain purchased, you need to create a free Cloudflare account.
Adding your domain to Cloudflare
The first time you log in to Cloudflare you'll see place to add your domain name.

Now click "Add site" then choose the free plan and click "Confirm plan".

Now Cloudflare will scan your current dns records. These records will most likely be using the DNS records of your domain reseller. In my case it would be Porkbun DNS.

Since this domain is already using Cloudflare, it shows the cloudflare dns IPs

Now click "Continue". Next we have to replace the domain reseller name servers with the provided Cloudflare name servers. again, I already did this.

Don't click "Done" until you go to your domain provider and change the name servers. This is where you do it in Porkbun.

Once the domain name name servers have been changed, click "Done" in Cloudflare.
Now it will take you through a "Quick start guide" where you can make a few adjustments to your settings.

I like to set the Encryption method to FULL because this seems to be the best suited option when using a reverse proxy.

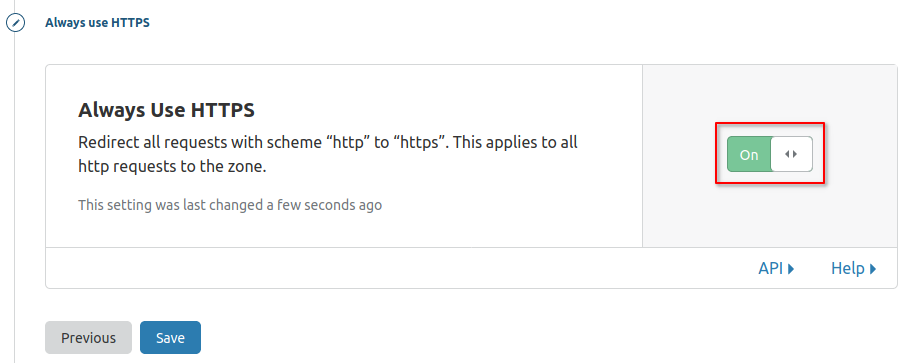
I turn on "always use HTTPS" because this will automatically send traffic through your SSL.
Auto Minify. I never check or change anything here. Just click "Save" and move on.

By default, Brotli is on. Leave this as is. It's always good to have more speed!

Finish the guide and wait for your domain servers to change to Cloudflare.

You can click "Re-check now" once to get a status update. You will get an email when your domain is ready to be managed through Cloudflare.
Now you can ping your domain to see that it is indeed using the Cloudflare DNS.

Create Domain Records to Point to your Home Server on Cloudflare Using Nginx Progy Manager
Please refer to the "Setup your Domain with Cloudflare" page before getting started here.
This works best for those who have either a static IP address or a long lease. We have Verizon FioS and have never seen our WAN IP change and we do not pay for a static IP. Maybe we are just lucky. But either way, I will set this up so if our IP does change, all we have to do is change one record for all the rest to follow suite.
We will be using Nginx Proxy Manager for keeping track of our hosts and SSL certificates. I found it is the most user friendly application for this purpose. More specifically, I use the jlesage/docker-nginx-proxy-manager docker image.
Before We Begin With Nginx Proxy Manager
Part 1
I want to preface this by expressing that it is best to run Nginx Proxy Manager on a dedicated machine, VM, container or the likes. This way we have access to port 80 and 443 on the machine so we won't have any conflicts with ports. Port 80 and 443 are the ONLY ports we have to expose on our router to get this setup and working. This allows us to create more services on our network and expose them to the internet WITHOUT opening more ports for those services to be accessed remotely. Pretty rad isn't it?
Another thing to note is if this machine goes down, all of the hosts will go down with it. That's why it is a good reason to separate this from your other shenanigans.
I run Nginx Proxy Manager on a LXC container in Proxmox but I won't be discussing that aspect of the setup.
Part 2
Nginx Proxy Manager works in conjunction with Docker. Docker allows us to install services and applications and assign ports during installation. These ports are what we use to route our traffic when exposing them using Nginx Proxy Manager. This guide assumes you already know how to use Docker. It's important that you understand the fundamentals and basics of Docker before moving forward.
Creating the Docker container
Begin by executing the following compose command. I use Portianer for easier management, but you can just as easily toss the compose file on your machine and run a docker-compose up -d.
docker run -d \
    --name=nginx-proxy-manager \
    -p 8181:8181 \
    -p 80:8080 \
    -p 443:4443 \
    -v /docker/appdata/nginx-proxy-manager:/config:rw \
    jlesage/nginx-proxy-manager
Once this is finished installing, you can access the web UI on port 8181 where you will be asked to login.

Default Administrator Account
After a fresh install, use the following credentials to login:
- Email address:
admin@example.com - Password:
changeme
You should immediately change the login credentials before moving forward.
Router Configuration
Now that this is done, we have to configure our router to point the ports to this machine. So take note of the local IP where Nginx Proxy Manager is installed. You can find the IP by typing this command in the terminal.
ip addrThen you will see it there, usually number 2 in the list or next to your NIC ID.

So in my case I have to forward ports 80 and 443 to 192.168.1.165 in my router. I assume you already knew this but just in case...
There are tons of different routers out there however, most of them are quite similar when it comes to port forwarding. I can't assume you all have a FioS gateway like I do but this is what it looks like. To access your router you will have to know the IP address of the router to get to the administration. Then login. Again, this guide assumes you already know how to do that.

Here you can see I added 2 rules for port 80 and 443 to the IP of the machine Nginx Proxy Manager is hosted on. Now, from here on out, Nginx Proxy Manager will act as our "pseudo router" where we only need to route the traffic to the domain rather than opening more ports.
Again, Please refer to the "Setup your Domain with Cloudflare" page before getting started on this next section. If you did not do this first, the following will not work.
Creating the A Record
- Log into your Cloudflare CP and go to the DNS page and click Add record
- Select Type A
- Put your domain name in
- Add your WAN IP go here to see it
- Make sure Proxy status is DNS only (for now)
- Save the record.

The reason we have to leave the proxy disabled (for now) is so Let's Encrypt can assign the certificate. Once the Host is setup. we can return here and cloak the IP by enabling the proxy status. If you will not be using the root domain, you can go ahead and proxy it now, otherwise create the Host in Nginx Proxy Manager first.
Add the Host
For this part, we have to have a service in mind that we want to expose. It's best to only expose services that have authentication. Such as a Wordpress blog. For applications like Wordpress, it's best to setup the domain BEFORE running the install because wordpress assigns URL's in the databse. So setup Wordpress in Docker but don't run the install until you get the domain setup in the Host in Nginx Proxy Manager.

Take note of the docker host IP and the port Wordpress is running on.
In Nginx Proxy Manager go to Hosts
Click on Add Proxy Host button (upper right)

NOTICE: The Domain Name is the domain we setup in Cloudflare. We are Forwarding the domain to the IP of our Wordpress/Docker host on port 8977.
Click SSL at the top to request a SSL certificate then click where it says "None" to drop down and select "Request a new SSL Certificate".

Now tick and agree to Let's Encrypt ToS. Then click Save.

When it's finished, it will close and take you to the dashboard. You will have to go back into this menu under SSL and enable "Force SSL" for this Host. This will ensure that your domain is only accessed on https no matter how it is typed into the address bar.
Don't forget to go back into the Cloudflare CP and enable the Proxy on the record to cloak your IP. If you're having issues accessing your domain, go into SSL/TLS and set the encryption to Full and try again.


Adding more Records in Cloudflare
Now that we have established that our root domain is pointing to our WAN IP, we can add more records using subdomains and CNAMES. Each record from here forward will be added as a CNAME derived from our A record. This way if our WAN IP does ever change, all we have to do is change the IP on the A record we made and all of our CNAMES will inherit the new IP.

This example will create bookstack.l33t.host then we will setup the Host on Nginx Proxy Manager the same way we did for Wordpress. Don't forget to leave the records unproxied until you create the Host in Nginx Proxy Manager.
Wrapping Up
You will discover when using Nginx Proxy Manager, some apps like Bookstack require Websockets enabled to work properly. As you tinker with it, you will learn things like this and it will make more sense how things work. Websockets can be enabled in the Nginx Proxy Manager Host

You can support the Nginx Proxy Manager developer on the original Github page. You can subscribe to my Youtube channel for more video guides too. The video below explains this guide. However I recommend using the CNAME method above for adding records rather than using all A records like I did in the video. Just incase your IP does change.
Nginx Proxy Manager
This project comes as a pre-built docker image that enables you to easily forward to your websites running at home or otherwise, including free SSL, without having to know too much about Nginx or Letsencrypt.
Adding a New Proxy Host to Nginx Porxy Manager
Coming soon.
Setup Authelia to work with Nginx Proxy Manager
If you are using Nginx Proxy Manager and want to add authentication to services or applications you expose, Authelia is a great solution for this. You can choose to use either one factor or two factor authentication for each proxy host you setup.

This guide is assuming you've already setup Docker and Nginx Proxy Manager and have some experience with adding Proxy Hosts and setting up dns records in Cloudflare.
I'll preface this with a notification about proxy hosts being used to access API's. As an example, if you create a proxy for sonarr to be used with the LunaSea app, it will not work behind Authelia. I haven't looked too deep into this but it makes sense that the app cannot authenticate to Authelia to use the API unless you bypass Authelia authentication altogether and just use the sonarr built in basic authentication.
Setting up the Authelia Server
I'll be setting my Authelia server up on a fresh Proxmox VM using Ubuntu 20.04. You can use an LXC with debian turnkey or whatever you wish.
Create the Working Directory
First thing we need to do is create a directory called authelia where we will create 1 more directory and 3 files. configuration.yml, users_database.yml and docker-compose.yml
cd /mkdir autheliacd autheliamkdir configcd configWe are now in /authelia/config
nano configuration.ymlPaste the following into configration.yml
##############################################################################
#                   Authelia configuration  thehomelab.wiki                  #
##############################################################################

host: 0.0.0.0
port: 9091 # if you need this changed make sure it reflects also in the docker-compose.yml
log_level: info
jwt_secret: A4gYb7QFpbfKaNWAX7P7FX5y
default_redirection_url: https://auth.yourdomain.com
totp:
  issuer: yourdomain.com
  period: 30
  skew: 1

#duo_api:     ## If you want push notifictions of login attempts you can pay for this feature
#  hostname: api-123456789.example.com
#  integration_key: ABCDEF
#  secret_key: yet-another-long-string-of-characters-and-numbers-and-symbols

authentication_backend:
  disable_reset_password: false
  file:
    path: /config/users_database.yml # Make sure this file exists
    password:
      algorithm: argon2id
      iterations: 1
      salt_length: 16
      parallelism: 8
      memory: 64

access_control:
  default_policy: deny
  rules:
    # Rules applied to everyone
    - domain:
        - "auth.yourdomain.com"
        - "some-app-with-api.yourdomain.com"
      policy: bypass
    - domain: # Proxies only requiring username and password
        - "homer.yourdomain.com"
      policy: one_factor
#      networks:
#        - 192.168.1.0/24
    - domain: # Proxies needing 2 factor below
        - "proxmox.yourdomain.com"
      policy: two_factor
#      networks:
#         - 192.168.1.0/24

session:
  name: authelia_session
  # This secret can also be set using the env variables AUTHELIA_SESSION_SECRET_FILE
  secret: BEcQnvjxawGh4U9JgXBMXNVE
  expiration: 3600 # 1 hour
  inactivity: 7200 # 2 hours
  domain: yourdomain.com # Needs to be your root domain

  redis:
    host: authelia_redis_1
    port: 6379
    # This secret can also be set using the env variables AUTHELIA_SESSION_REDIS_PASSWORD_FILE
#    password: authelia

regulation:
  max_retries: 5
  find_time: 2m
  ban_time: 10m

theme: dark   # options: dark, light

storage:
  local:
    path: /config/db.sqlite3

notifier:
  filesystem:
    filename: /config/notification.txt
#  smtp:
#    username: <your-user@your-email-domain.org>
#    password: <your-user-email-password-for-smtp>
#    host: <your-email-host-url-or-ip>
#    port: <your-email-port-for-smtp>  # 25 non-ssl, 443 ssl, 587 tls
#    sender: <sender@your-email-domain.org>
#    subject: "[Authelia] {title}"
#    disable_require_tls: false # set to true if your domain uses no tls or ssl only
#    disable_html_emails: false # set to true if you don't want html in your emails
#    tls:
#      server_name: <your-email-host-url-or-ip>
#      skip_verify: false
#      minimum_version: TLS1.2
Do not edit anything that is not mentioned below unless you know exactly what you are doing
Line 8 - This doesn't have to be changed but I'd recommend it. Maybe add or change a few letters/numbers.
Line 9 - Create a new record in Cloudflare then add it in Nginx Proxy Manager as you normally would. We will come back to this later. make sure it's the domain with all your services and applications you want exposed.
Line 11 - This is your main root domain you will be using and has to be the same domain used on line 9. Authelia can only manage one domain and sub domains within. If you want to protect more domains, you have to setup another instance of Authelia.
Line 31 - Access Control. I have placed examples that you will need to change. Anything above line 37 or "bypass" tells authelia to ignore authentication. We want to make sure our auth redirect page is here otherwise we won't be able to access it. You can see that on line 36.
Line 56 - Change this to your root domain name.
IMPORTANT: If you have a proxy that requires access to an API for a mobile app, you will need to bypass authentication
You can still use Authelia on the domain however, you will have to add any proxy that is calling an API into the bypass section of the config and use the applications native authentication if it has one. Whether it be Next Cloud, Sonarr, Radarr or whatever it is that needs access to the API. Thankfully, most of these apps that we use that we need access to the API have built in authentication. Most of them anyway.
Lin 42 - You can restrict access to only machines on your IP range. I have commented this out because I am not using network restrictions and I think most people using this won't be either.
Line 52 - You can change the secret.
Line 74 - Notifier - This is important. If you are using two factor, this is how you will be notified of your authentication links and password recovery. This will make a file in /authelia/config/notification.txt where it will overwrite the file with notifications. For example, when you setup two factor, this is the file you will open to get the link to verify authentication.
You can setup SMTP but I just found this to be easier for me. I setup filebrowser and just added a book mark to that file so I can easily view the file. I did the same for my configuration.yml file so I can easily edit it on the fly when I need to add new proxy hosts to the file.
Create Users Database File
Now we have to create the users_database.yml file. We should still be inside the /authelia/config directory.
nano users_database.ymlPaste the following into users_database.yml and make sure to edit your name and email.
###############################################################
#                         Users Database                      #
###############################################################

# This file can be used if you do not have an LDAP set up.

# List of users
users:
  john:
    displayname: "john doe"
    password: "$argon2id$v=19$m=1048576,t=1,p=8$MFJSeXh0V2VKVWZEZFJiZg$EOSz2OgjIIV//MWf8"   #hash using docker run authelia/authelia:latest YOURNAME hash-password SOMEPASSWORD
    email: johndoe@gmail.com
    groups:
      - admins
      - dev
Now is a good time to run the hash generator docker file so let's do that.
docker run authelia/authelia:latest authelia hash-password 'yourpassword'This will spit out your new hash. Make sure you replace the hash given to you with the hash in the file above. Leave the quotes.
Create the Docker Compose File
The finale file we will be creating for this directory is the docker-compose.yml file. We need to back out one directory into /authelia
nano docker-compose.ymlPaste the following into docker-compose.yml
version: '3.3'
services:
  authelia:
    image: authelia/authelia
#   image: authelia/authelia:4.31
    volumes:
      - ./config:/config
    ports:
      - 9091:9091
    restart: unless-stopped
    healthcheck:
      disable: true
    environment:
      - TZ=America/Chicago
    depends_on:
      - redis

  redis:
    image: redis:alpine
    volumes:
      - ./redis:/data
    expose:
      - 6379
    restart: unless-stopped
    environment:
      - TZ=America/Chicago
Make sure you change the TZ to reflect your own time zone. This is important for using two factor authentication. You can remove the commented image line. I like to save it so I know what image I used when I ran the install.
Install Authelia
From within the /authelia directory, you can now run the docker-compose install.
docker-compose up -dNginx Proxy Manager Configurations
Create a new Proxy Host for Authelia redirect. The example I used in the config file is auth.yourdomain.com. Respectfully, you will have to set this up in cloudlfare as you should already know.
Redirect Proxy Host
You will set this up just like any other Proxy Host and save it, Once you have it all setup and saved with a working certificate from Let's Encrypt, edit the Proxy Host and go to the Advanced tab. This is where we will put the Custom Nginx Configuration for Authelia.
Paste the following into the advanced tab
    location / {
        set $upstream_authelia http://192.168.1.25:9091;
        proxy_pass $upstream_authelia;
        client_body_buffer_size 128k;

        #Timeout if the real server is dead
        proxy_next_upstream error timeout invalid_header http_500 http_502 http_503;

        # Advanced Proxy Config
        send_timeout 5m;
        proxy_read_timeout 360;
        proxy_send_timeout 360;
        proxy_connect_timeout 360;

        # Basic Proxy Config
        proxy_set_header Host $host;
        proxy_set_header X-Real-IP $remote_addr;
        proxy_set_header X-Forwarded-For $proxy_add_x_forwarded_for;
        proxy_set_header X-Forwarded-Proto $scheme;
        proxy_set_header X-Forwarded-Host $http_host;
        proxy_set_header X-Forwarded-Uri $request_uri;
        proxy_set_header X-Forwarded-Ssl on;
        proxy_redirect  http://  $scheme://;
        proxy_http_version 1.1;
        proxy_set_header Connection "";
        proxy_cache_bypass $cookie_session;
        proxy_no_cache $cookie_session;
        proxy_buffers 64 256k;

        # If behind reverse proxy, forwards the correct IP
        set_real_ip_from 10.0.0.0/8;
        set_real_ip_from 172.0.0.0/8;
        set_real_ip_from 192.168.0.0/16;
        set_real_ip_from fc00::/7;
        real_ip_header X-Forwarded-For;
        real_ip_recursive on;
    }
Do not edit anything that is not mentioned below unless you know exactly what you are doing
Now all you have to change here is line 2. Change the IP to your Authelia server/host. You can find the IP by running this command.
ip addr Make sure you click save then test the host to make sure it works.
All other Proxy Hosts
For any other Proxy Host you add to Nginx Proxy Manager, the JSON will be a little different. As an example, I want to put authentication on my Homer dashboard. I create a Proxy Host homer.yourdomain.com for this. In the advanced tab for this Proxy Host I need the following JSON.
location /authelia {
    internal;
    set $upstream_authelia http://192.168.1.25:9091/api/verify; #ADD YOUR IP AND PORT OF AUTHELIA
    proxy_pass_request_body off;
    proxy_pass $upstream_authelia;
    proxy_set_header Content-Length "";

    # Timeout if the real server is dead
    proxy_next_upstream error timeout invalid_header http_500 http_502 http_503;
    client_body_buffer_size 128k;
    proxy_set_header Host $host;
    proxy_set_header X-Original-URL $scheme://$http_host$request_uri;
    proxy_set_header X-Real-IP $remote_addr;
    proxy_set_header X-Forwarded-For $remote_addr;
    proxy_set_header X-Forwarded-Proto $scheme;
    proxy_set_header X-Forwarded-Host $http_host;
    proxy_set_header X-Forwarded-Uri $request_uri;
    proxy_set_header X-Forwarded-Ssl on;
    proxy_redirect  http://  $scheme://;
    proxy_http_version 1.1;
    proxy_set_header Connection "";
    proxy_cache_bypass $cookie_session;
    proxy_no_cache $cookie_session;
    proxy_buffers 4 32k;

    send_timeout 5m;
    proxy_read_timeout 240;
    proxy_send_timeout 240;
    proxy_connect_timeout 240;
}

    location / {
        set $upstream_homer http://192.168.1.30:8080;  #CHANGE NAME AND IP AND PORT
        proxy_pass $upstream_homer;  #change name of the service

		auth_request /authelia;
		auth_request_set $target_url $scheme://$http_host$request_uri;
		auth_request_set $user $upstream_http_remote_user;
		auth_request_set $groups $upstream_http_remote_groups;
		proxy_set_header Remote-User $user;
		proxy_set_header Remote-Groups $groups;
		error_page 401 =302 https://auth.yourdomain.com/?rd=$target_url; #change YOURDOMAIN.COM to your domain

		client_body_buffer_size 128k;

		proxy_next_upstream error timeout invalid_header http_500 http_502 http_503;

		send_timeout 5m;
		proxy_read_timeout 360;
		proxy_send_timeout 360;
		proxy_connect_timeout 360;

		proxy_set_header Host $host;
		proxy_set_header X-Real-IP $remote_addr;
		proxy_set_header X-Forwarded-For $proxy_add_x_forwarded_for;
		proxy_set_header X-Forwarded-Proto $scheme;
		proxy_set_header X-Forwarded-Host $http_host;
		proxy_set_header X-Forwarded-Uri $request_uri;
		proxy_set_header X-Forwarded-Ssl on;
		proxy_redirect  http://  $scheme://;
		proxy_http_version 1.1;
		proxy_set_header Connection "";
		proxy_cache_bypass $cookie_session;
		proxy_no_cache $cookie_session;
		proxy_buffers 64 256k;

		set_real_ip_from 192.168.1.0/16;
		real_ip_header X-Forwarded-For;
		real_ip_recursive on;

    }
Do not edit anything that is not mentioned below unless you know exactly what you are doing
You will need to edit line 3 with your own Authelia server/host IP and port. When you do this the first time you can just copy it and save it so you don't have to keep changing this line. However, there are a couple lines you will have to change every time you add this to another Proxy Host. It's not hard though!
Line 33 - This line has an upstream name. Change this to the name of the service then the IP and port which the service is running on. If the service is on port 80, no port is required. Just the IP.
Line 34 - Same thing. Change the service name to match that on line 33.
Line 42 - This is like line 3. When you change this once and save it, you wont have to change it every time.
Don't Forget
The configuration.yml file will need to be edited when ever you want to add authentication to a new Proxy Host. You will need to also add the corresponding JSON above in Nginx Proxy Manager advanced tab. Once edited, you will need to restart Authelia. You can do this with Portainer or by running the following command from within /authelia directory.
docker-compose restartDid you find this helpful? Subscribe to me on Youtube for more content!